Beasts Get Nicknamed in Hogwarts Legacy
Author : Lily
Feb 12,2025
Hogwarts Legacy: A Guide to Nicknaming Your Rescued Beasts
Hogwarts Legacy continues to delight players with its depth and hidden features. One such feature, often overlooked, is the ability to rename rescued beasts. This seemingly small detail significantly enhances player immersion and personalization. This guide will walk you through the process.
Steps to Nicknaming Beasts
To give your rescued beasts personalized nicknames, follow these steps:
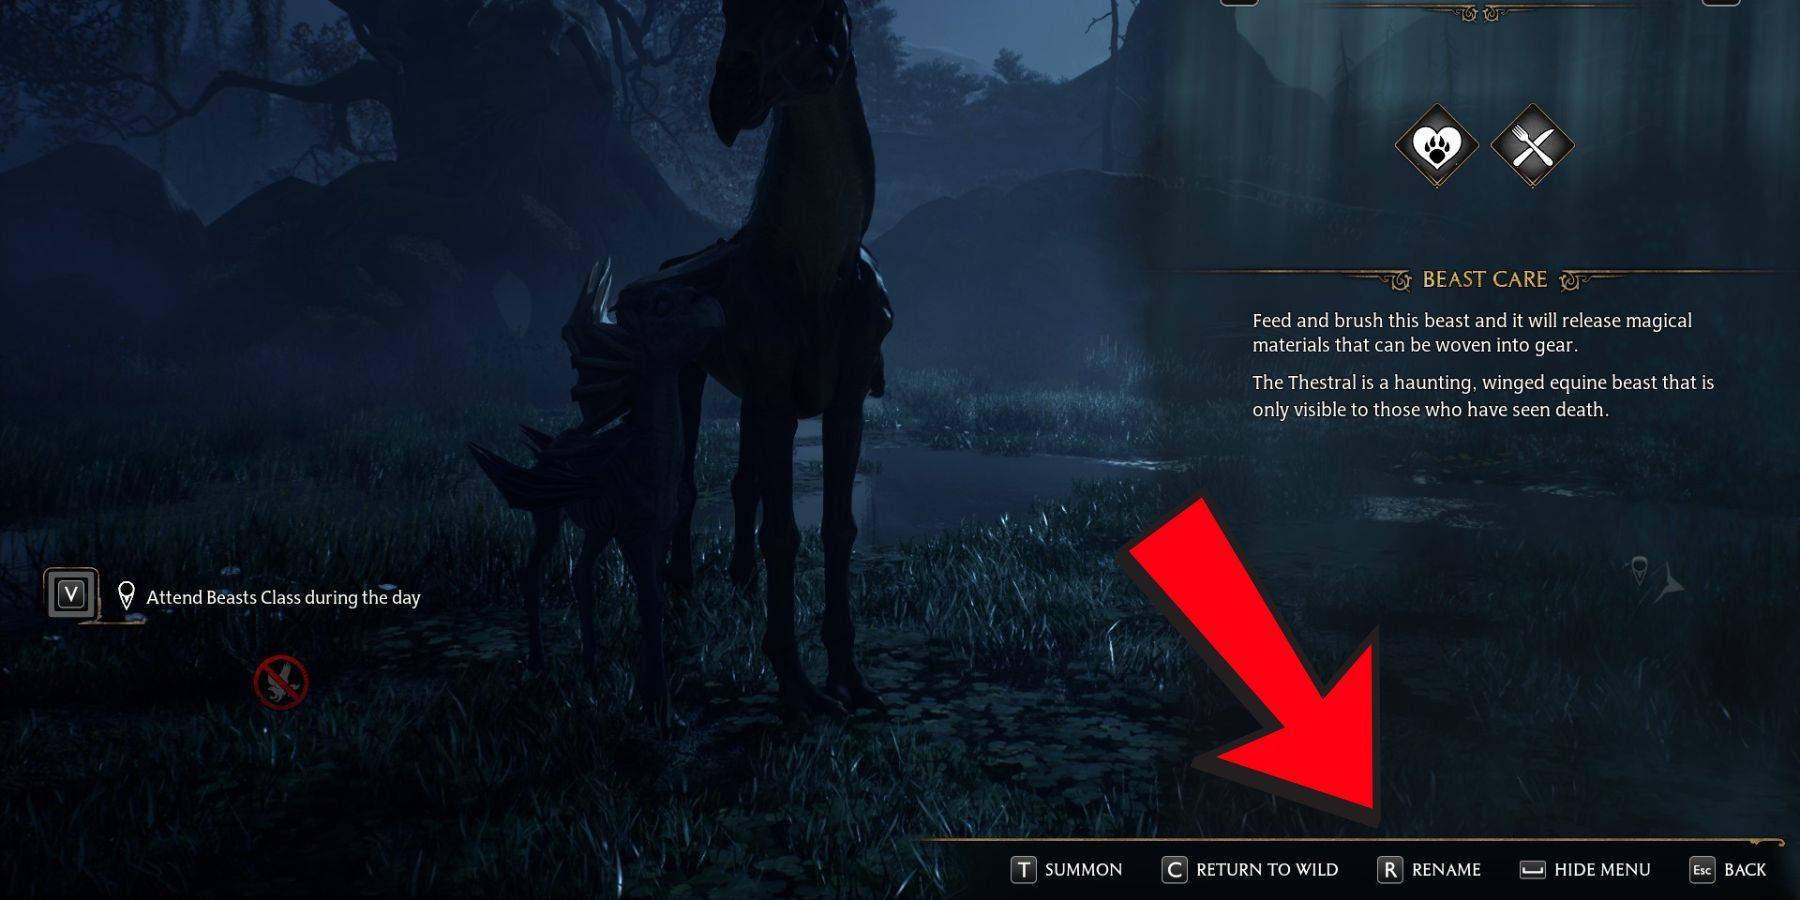
- Access the Vivarium: Travel to the Room of Requirement in Hogwarts Castle and enter your Vivarium.
- Summon the Beast: Ensure the beast you wish to rename is present. If it's in your Beast Inventory, summon it using the appropriate menu.
- Interact with the Beast: Approach the beast and interact with it. This will display its current health and other information.
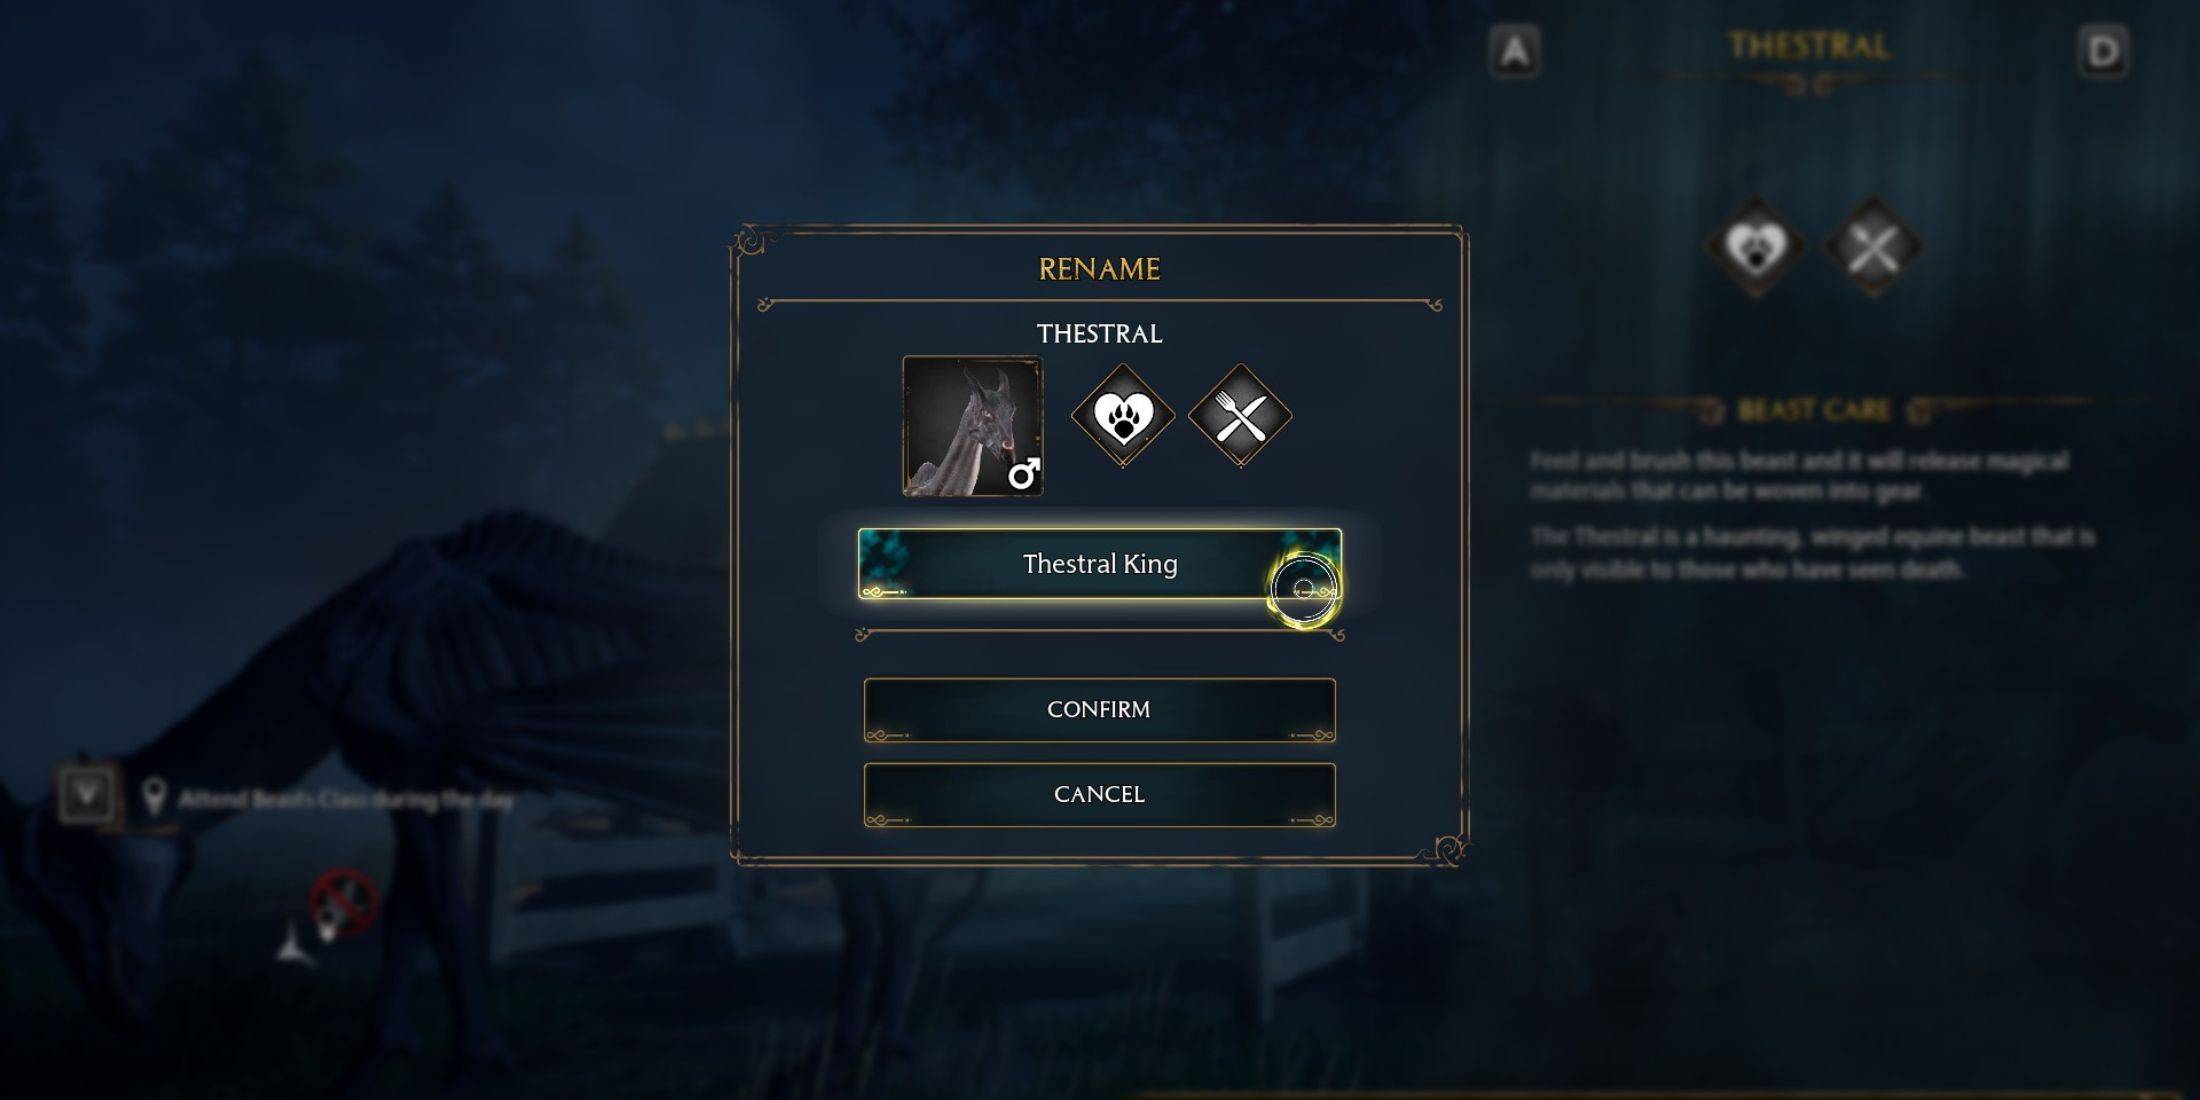
- Select "Rename": Within the interaction menu, you'll find the option to rename your beast. Choose this option.
- Enter and Confirm Nickname: Type your desired nickname and select "Confirm."
- View Nickname: Approach the beast again and interact; you'll see its new name displayed.
Benefits of Renaming Beasts
Renaming your beasts offers several advantages:
- Improved Management: Easily identify and track your creatures, especially useful for managing rare or valuable beasts.
- Unlimited Renaming: Change nicknames as often as you like – there are no limitations.
- Enhanced Ownership: Personalizing your beasts strengthens your connection to them and adds another layer of customization.
Enjoy the added level of personalization and organization that renaming your rescued beasts provides in Hogwarts Legacy!
Latest articles
-
 It Has Multiple Endings-----------------------There are nine different endings, all based on the relationships you build with other trapped students. Saving them, ignoring them, or sacrificing them changes where the story goes and what kind of horrAuthor : Hunter May 07,2026
 -
 Infinity Nikki's Eerie Season arrives on February 26th, following scheduled maintenance.This spooky early Halloween treat features a haunted castle, new cosmetics, and additional content.Explore the Queen's Palace Ruins and participate in limited-timAuthor : Allison May 05,2026


Trending Games


![A Father’s Sins – Going to Hell [Ch. 7 Public] By Pixieblink](https://img.laxz.net/uploads/67/1719578270667eae9eb6a75.jpg)


Top News