How to Connect the Asus ROG Ally to a TV or Gaming Monitor
The ASUS ROG Ally, a compelling Steam Deck alternative, offers even broader game access through its Windows OS. The 2023 ROG Ally and its enhanced 2024 successor, the ROG Ally X (featuring improved cooling and ergonomics), both boast easy big-screen connectivity. This guide details how to connect your ROG Ally to a TV or monitor.
Connecting via Adapter:
This straightforward method utilizes a compact adapter. Options include small dongles, direct cables, or the official ROG Gaming Charger Dock (offering simultaneous charging).
What You Need:

ASUS ROG 65W Charger Dock: This optimal solution combines charging and HDMI 2.0 connectivity with additional USB Type-A and Type-C ports.
Alternatively, a third-party USB-C to HDMI adapter or a direct USB-C to HDMI cable can be used. Some adapters include a passthrough USB-C port for charging, requiring an extra USB-C cable and power adapter.
Step-by-Step Instructions:
- Connect a USB-C to HDMI adapter (or cable) to the ROG Ally's top USB-C port. For the ROG Gaming Charger Dock, use a USB-C cable connecting the Ally and the dock.
- Connect an HDMI cable from the adapter (or dock) to your TV/monitor's HDMI port. Direct USB-C to HDMI cables require only one connection.
- (Optional) If using a passthrough charging port, connect the power adapter.
- Power on the Ally; video output should be automatic.
- Select the correct HDMI input on your TV/monitor.
Connecting via Docking Station:
A docking station provides a more integrated solution, similar to a Nintendo Switch dock. While no official dock exists beyond the ROG Gaming Charger Dock, many third-party options are available.
What You Need:
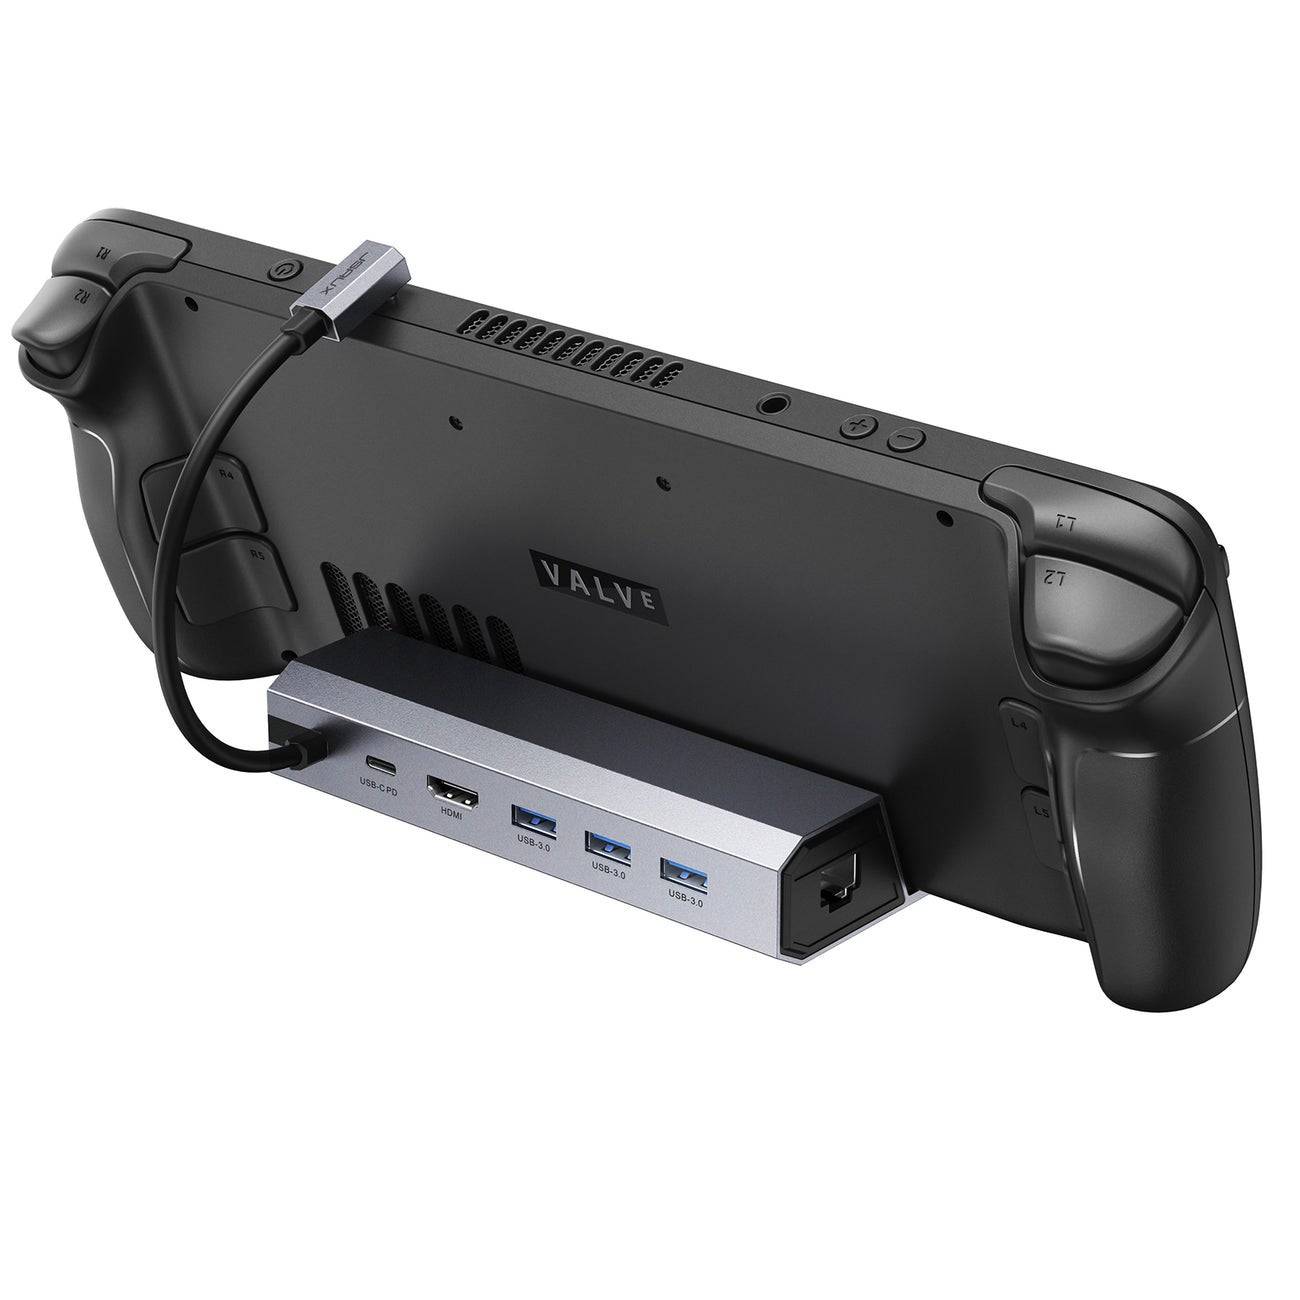
JSAUX Docking Station HB0603 (Example): This compact dock offers a stand, fast charging (2100 watts), and multiple ports.
Docks vary in features, offering additional USB ports, Ethernet, SD card slots, and even DisplayPort for multiple displays.
Step-by-Step Instructions:
- Place the ROG Ally in the dock.
- Connect the USB-C power cord to the Ally's top USB-C port.
- Connect the power adapter to the dock's USB-C charging port.
- Connect an HDMI cable from the dock to your TV/monitor.
- Power on the Ally; video output should be automatic.
- Select the correct HDMI input on your TV/monitor.
Controller Recommendation:
For optimal large-screen gaming, a wireless controller is recommended. The ROG Ally supports Bluetooth controllers, including the Sony DualSense, Xbox Elite Series 2, 8BitDo Ultimate, GuliKit KingKong 3 Max, and PowerA Wireless GameCube Style controllers. Wired USB controllers are also an option.
-
 In Dying Light: The Beast, players step back into the shoes of Kyle Crane as he explores the perilous Castor Woods in this standalone action-adventure RPG. Dive into the latest updates and developments for the game!← Return to Dlying Light: The BeastAuthor : Ethan May 10,2026
 -
 Now is your chance to grab a top-tier OLED TV at one of the lowest prices we've spotted, particularly for a recent 2024 Samsung model. Currently, both Samsung Shop and Amazon are offering the 65" Samsung S85D 4K OLED Smart TV for just $999.99 with frAuthor : Hazel May 08,2026


![A Father’s Sins – Going to Hell [Ch. 7 Public] By Pixieblink](https://img.laxz.net/uploads/67/1719578270667eae9eb6a75.jpg)


- Spring Valley Farm Game: January 2025 Redeem Codes
- "Save 20% on Top 2025 PC Games"
- Mobile Legends: Bang Bang – Best Lukas Build
- Pokémon Presents 2025 Unveils Exciting Reveals
- "Grand Outlaws Unleashes Chaos and Crime on Android Soft Launch"
- Pokémon Sleep Is Celebrating Valentine’s Day with Éclair, Cheesecake and More Desserts!