How to Connect the Asus ROG Ally to a TV or Gaming Monitor
The ASUS ROG Ally, a compelling Steam Deck alternative, offers even broader game access through its Windows OS. The 2023 ROG Ally and its enhanced 2024 successor, the ROG Ally X (featuring improved cooling and ergonomics), both boast easy big-screen connectivity. This guide details how to connect your ROG Ally to a TV or monitor.
Connecting via Adapter:
This straightforward method utilizes a compact adapter. Options include small dongles, direct cables, or the official ROG Gaming Charger Dock (offering simultaneous charging).
What You Need:

ASUS ROG 65W Charger Dock: This optimal solution combines charging and HDMI 2.0 connectivity with additional USB Type-A and Type-C ports.
Alternatively, a third-party USB-C to HDMI adapter or a direct USB-C to HDMI cable can be used. Some adapters include a passthrough USB-C port for charging, requiring an extra USB-C cable and power adapter.
Step-by-Step Instructions:
- Connect a USB-C to HDMI adapter (or cable) to the ROG Ally's top USB-C port. For the ROG Gaming Charger Dock, use a USB-C cable connecting the Ally and the dock.
- Connect an HDMI cable from the adapter (or dock) to your TV/monitor's HDMI port. Direct USB-C to HDMI cables require only one connection.
- (Optional) If using a passthrough charging port, connect the power adapter.
- Power on the Ally; video output should be automatic.
- Select the correct HDMI input on your TV/monitor.
Connecting via Docking Station:
A docking station provides a more integrated solution, similar to a Nintendo Switch dock. While no official dock exists beyond the ROG Gaming Charger Dock, many third-party options are available.
What You Need:
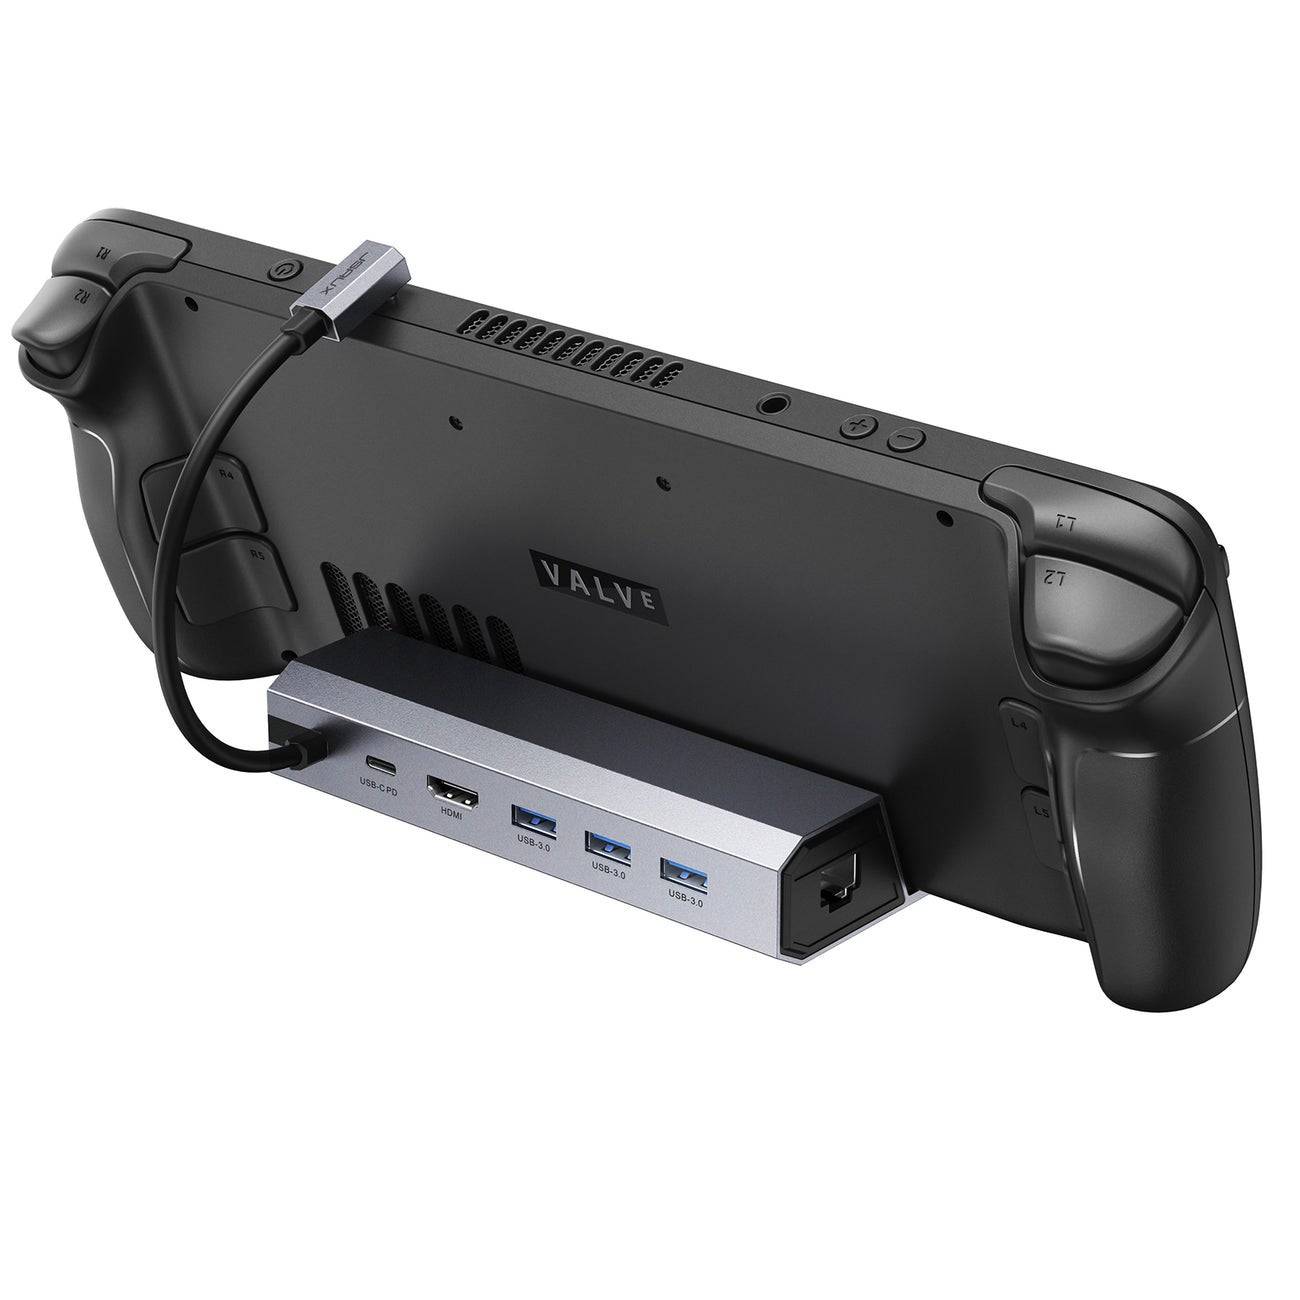
JSAUX Docking Station HB0603 (Example): This compact dock offers a stand, fast charging (2100 watts), and multiple ports.
Docks vary in features, offering additional USB ports, Ethernet, SD card slots, and even DisplayPort for multiple displays.
Step-by-Step Instructions:
- Place the ROG Ally in the dock.
- Connect the USB-C power cord to the Ally's top USB-C port.
- Connect the power adapter to the dock's USB-C charging port.
- Connect an HDMI cable from the dock to your TV/monitor.
- Power on the Ally; video output should be automatic.
- Select the correct HDMI input on your TV/monitor.
Controller Recommendation:
For optimal large-screen gaming, a wireless controller is recommended. The ROG Ally supports Bluetooth controllers, including the Sony DualSense, Xbox Elite Series 2, 8BitDo Ultimate, GuliKit KingKong 3 Max, and PowerA Wireless GameCube Style controllers. Wired USB controllers are also an option.
-
 Clash Royale has finally introduced a major upgrade for the Inferno Dragon, nearly a decade after its initial release. The fiery Legendary card now boasts enhanced capabilities, with Supercell partnering with Finnish comedian Ismo Leikola for a speciAuthor : Natalie Dec 22,2025
 -
 HBO's Harry Potter TV series has reached a major casting milestone with the first six roles officially announced. While fans eagerly await reveals for Harry, Ron, Hermione, and Voldemort, we now know who will portray Albus Dumbledore, Minerva McGonagAuthor : Gabriel Dec 22,2025


- Spring Valley Farm Game: January 2025 Redeem Codes
- WWE Superstars Join Call of Duty Warzone: Mobile Roster
- Midnight Girl is a minimalist point-and-click adventure set in Paris in the 60s, now open for pre-orders on mobile
- Mobile Legends: Bang Bang – Best Lukas Build
- "Grand Outlaws Unleashes Chaos and Crime on Android Soft Launch"
- Video Game Song Surpasses 100 Million Streams on Spotify